
How to Fix Uneven Volume in a Video
Fix uneven volume in stages: correct clip-level differences, control sudden peaks, automate intentional changes, then normalize the completed program toward
Fix uneven volume in stages: correct clip-level differences, control sudden peaks, automate intentional changes, then normalize the completed program toward the destination’s loudness requirement. Do not use a single limiter to make every source equally loud.
The practical goal is not to make one processing screen look successful. It is to preserve the viewer’s ability to understand the intended message after editing, encoding, platform upload, and localization. This guide treats the task as a controlled workflow: diagnose first, make the least destructive change, and validate the actual deliverable.
Start With the Viewer’s Failure

People usually describe a production symptom—“the subtitles look wrong,” “the voice sounds off,” or “the audio is bad”—but that description is not yet a diagnosis. Ask what the viewer cannot do. Can they not read the line, identify the speaker, hear a word, follow the sequence, trust the performance, or act on the CTA? The answer determines which evidence matters.
- Determine whether the jump is between clips, between speakers, within one sentence, or between dialogue and music.
- Check whether perceived loudness differs even when peak meters look similar.
- Find clipped or distorted sections; level reduction cannot restore information already lost.
Create a short issue log with timecode, symptom, likely cause, severity, owner, and acceptance test. This is faster than passing subjective notes such as “make it cleaner” among editors, translators, and reviewers.
Decide What Good Looks Like
Use explicit release criteria before you touch the file.
| Gate | Question | Evidence |
|---|---|---|
| Meaning | Are facts, names, numbers, negation, conditions, and intent preserved? | Source comparison and native or subject-matter review |
| Perception | Can a first-time viewer understand the important moment once? | Fresh-listener or fresh-viewer test |
| Technical | Does the output retain sync, encoding, channels, fonts, and required format? | File inspection and final-render playback |
| Continuity | Do edited sections belong to the same program? | A/B review across transitions |
| Delivery | Does the destination platform display and play it correctly? | Private upload or representative device test |
| Repeatability | Can another operator reproduce the approved result? | Versioned settings, glossary, or decision log |
A quality gate should include a stop condition. If key words remain unintelligible, if protected meaning changes, if direction or timing breaks, or if processing artifacts attract attention, do not keep adding aggressive corrections. Escalate to a different method or replacement.
Full Workflow
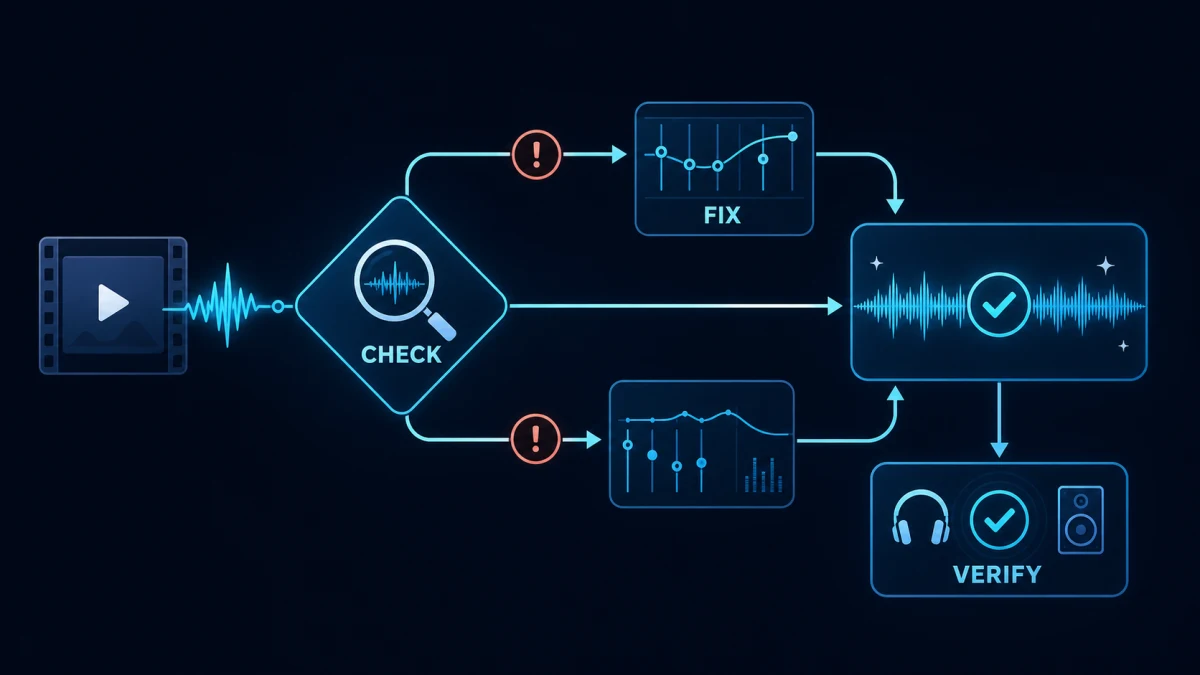
1. Choose a reference listening level
Monitor consistently and select one good dialogue segment as an anchor. Constant playback level prevents chasing the volume knob.
Do not approve this stage from an interface message alone. Compare the result with the preserved source, inspect the most difficult segment, and record the setting or decision that produced the accepted version. If this stage changes timing, wording, channels, or visible text, flag every downstream asset that must be regenerated.
2. Balance clips before dynamics processing
Use clip gain to bring speakers and recordings into the same neighborhood. Large mismatches should not be delegated to a compressor.
Do not approve this stage from an interface message alone. Compare the result with the preserved source, inspect the most difficult segment, and record the setting or decision that produced the accepted version. If this stage changes timing, wording, channels, or visible text, flag every downstream asset that must be regenerated.
3. Repair within-clip changes
Draw gain automation for words that disappear or sudden handling noise. Preserve expressive dynamics while removing distracting jumps.
Do not approve this stage from an interface message alone. Compare the result with the preserved source, inspect the most difficult segment, and record the setting or decision that produced the accepted version. If this stage changes timing, wording, channels, or visible text, flag every downstream asset that must be regenerated.
4. Control peaks transparently
Use compression or limiting only as needed. Listen for pumping, breath exaggeration, and ambience rising between phrases.
Do not approve this stage from an interface message alone. Compare the result with the preserved source, inspect the most difficult segment, and record the setting or decision that produced the accepted version. If this stage changes timing, wording, channels, or visible text, flag every downstream asset that must be regenerated.
5. Set music and effects around speech
Duck or automate competing elements at the moments that matter. Lowering the entire music bed may make the mix lifeless while still masking key words.
Do not approve this stage from an interface message alone. Compare the result with the preserved source, inspect the most difficult segment, and record the setting or decision that produced the accepted version. If this stage changes timing, wording, channels, or visible text, flag every downstream asset that must be regenerated.
6. Measure integrated and short-term loudness
Peak level alone does not represent perceived volume. Check the complete program and the loudest sections against destination guidance.
Do not approve this stage from an interface message alone. Compare the result with the preserved source, inspect the most difficult segment, and record the setting or decision that produced the accepted version. If this stage changes timing, wording, channels, or visible text, flag every downstream asset that must be regenerated.
7. Normalize only after the mix works
Normalization moves the finished level; it does not repair bad internal balance. Recheck true peaks after conversion and export.
Do not approve this stage from an interface message alone. Compare the result with the preserved source, inspect the most difficult segment, and record the setting or decision that produced the accepted version. If this stage changes timing, wording, channels, or visible text, flag every downstream asset that must be regenerated.
8. Test real playback environments
Listen on headphones, a phone speaker, laptop speakers, and a normal room level. Verify that quiet words survive without loud moments becoming painful.
Do not approve this stage from an interface message alone. Compare the result with the preserved source, inspect the most difficult segment, and record the setting or decision that produced the accepted version. If this stage changes timing, wording, channels, or visible text, flag every downstream asset that must be regenerated.
Worked Example
A course video alternates between a close microphone, a remote guest, and screen recordings. The editor first uses clip gain to match the guest and host, automates two sentences recorded too quietly, and lowers notification sounds. Light compression controls peaks; final normalization sets the deliverable level. The result stays intelligible on a phone without flattening emphasis.
This example illustrates a wider rule: solve the highest-impact constraint first, then reassess. Processing order matters because every stage changes the evidence available to the next one. A workflow that jumps straight to export can hide the cause and make later corrections expensive.
How to Judge the Result Objectively
Use a three-pass review.
Pass 1: technical isolation
Inspect the exact defect on a short, repeatable segment. Keep settings stable, compare against the original, and avoid changing multiple variables. For audio, level-match before listening. For subtitles or graphics, use the same frame, scale, and renderer.
Pass 2: narrative and task context
Watch at least the full scene before and after the corrected moment. Verify that the line, sound, or graphic still performs its job. A local edit may be technically clean but remove a joke, soften a warning, hide a product demonstration, or create an unnatural transition.
Pass 3: final delivery
Review the encoded deliverable from beginning to end. Test representative devices and the destination platform when possible. Verify the first seconds, the most difficult section, transitions, and the ending. Random spot checks are useful only in addition to these known risk points.
Track defects by severity:
- Blocker: wrong language, missing media, changed fact, rights problem, broken sync, unreadable text, or unintelligible required speech.
- Major: repeated terminology error, obvious artifact, inconsistent tone, distracting level jump, or failed CTA.
- Minor: isolated cosmetic issue that does not change comprehension.
- Preference: stylistic alternative that does not violate the brief.
Do not let a long list of preferences obscure one blocker.
Where the Related Workflows Fit
If the defect is upstream, start with the related workflow to diagnose whether masking requires isolation or denoising. That prevents polishing a symptom while the source problem remains.
When the first pass is stable, improve dialogue clarity before simply raising level provides the next operational layer. Use it only where the current diagnosis shows that extra treatment is needed.
Before delivery, decide when a damaged recording should be replaced. This handoff matters because a technically correct intermediate file can still fail in context.
Finally, validate loudness and peaks at release so the decision is validated in the complete publishing workflow.
These links represent handoffs, not a requirement to use every tool. Keep the workflow proportional. If the source is already clear and valid, additional processing can create more risk than value.
How Recapo Fits the Process
Recapo’s current relevant production tool can accelerate the central processing step in this workflow. Use it on a copy of the source, begin with a representative sample, and save the output with a versioned name. Automation is most valuable when it produces a reviewable candidate quickly.
It does not replace:
- source-version control;
- native-language or subject-matter judgment;
- rights and consent review;
- an acceptance test tied to the viewer’s task;
- inspection of the final encoded file; or
- a human decision when the source information was never captured.
For a repeatable team process, store the source, tool output, settings or prompts, human corrections, approval status, and final export together. That record prevents the next project from repeating the same diagnosis.
Common Failure Modes and Recovery
Normalizing every raw clip independently and destroying intentional hierarchy.
Why it fails: the workflow optimizes one visible symptom while leaving meaning, timing, intelligibility, or delivery behavior untested.
Correction: return to the smallest representative sample, change one variable, compare at matched conditions, and accept the result only after it survives the final context.
Using peak meters as the only loudness measure.
Why it fails: the workflow optimizes one visible symptom while leaving meaning, timing, intelligibility, or delivery behavior untested.
Correction: return to the smallest representative sample, change one variable, compare at matched conditions, and accept the result only after it survives the final context.
Compressing heavily before correcting obvious clip-gain differences.
Why it fails: the workflow optimizes one visible symptom while leaving meaning, timing, intelligibility, or delivery behavior untested.
Correction: return to the smallest representative sample, change one variable, compare at matched conditions, and accept the result only after it survives the final context.
Raising quiet distorted audio until the distortion becomes louder.
Why it fails: the workflow optimizes one visible symptom while leaving meaning, timing, intelligibility, or delivery behavior untested.
Correction: return to the smallest representative sample, change one variable, compare at matched conditions, and accept the result only after it survives the final context.
Ignoring platform encoding and true-peak changes.
Why it fails: the workflow optimizes one visible symptom while leaving meaning, timing, intelligibility, or delivery behavior untested.
Correction: return to the smallest representative sample, change one variable, compare at matched conditions, and accept the result only after it survives the final context.
A Practical Team Handoff
A useful handoff package contains:
- source filename and checksum or version;
- exact timecodes in scope;
- target language, market, platform, and aspect ratio where relevant;
- approved transcript, glossary, pronunciation, or audio reference;
- processing method and settings;
- known limitations and intentionally accepted residue;
- before-and-after sample;
- final acceptance criteria;
- reviewer name and review date; and
- final export plus editable source.
For high-volume work, review every first item in a new format or language, then sample routine items and inspect every flagged exception. Sampling is safe only after the process is stable and blockers have an escalation route.
Final Checklist
Before approval, confirm:
- the correct source and destination version were used;
- the original remains preserved;
- the problem was classified before treatment;
- protected meaning, names, numbers, and timing remain correct;
- settings were tested on both difficult and clean sections;
- no new artifact is more distracting than the original defect;
- transitions and continuity are natural;
- captions, voice, graphics, and picture remain aligned;
- the final encoded file was reviewed;
- representative device or platform behavior was tested;
- rights, disclosures, and accessibility needs were checked; and
- the decision and reusable settings were documented.
Frequently Asked Questions
Should I use the strongest automatic setting?
Usually no. Stronger processing can remove useful speech detail, natural ambience, typographic structure, or performance nuance. Start with the least destructive change that passes the acceptance test.
Can I approve from a waveform, transcript, or preview?
No single representation proves quality. A waveform cannot show meaning, a transcript cannot prove timing, and an editor preview cannot prove platform behavior. Review the finished audiovisual result.
Should every language or recording use identical settings?
Use the same quality gates, not necessarily identical settings. Languages differ in syntax, direction, duration, and performance. Recordings differ in room, microphone, noise, and dynamics.
What if the source is genuinely unrecoverable?
Do not invent missing information or hide the limitation. Re-record, replace, return to an original source, revise the edit, or disclose the uncertainty. A clean-looking output cannot restore content that was never captured.
How do I scale the workflow?
Stabilize one representative item, document decisions, create reusable glossaries or presets, and maintain an exception queue. Automate candidate generation and mechanical checks while keeping human review on meaning, naturalness, and release risk.
Conclusion
Fix uneven volume in stages: correct clip-level differences, control sudden peaks, automate intentional changes, then normalize the completed program toward the destination’s loudness requirement. Do not use a single limiter to make every source equally loud.
The reliable pattern is simple: preserve the source, diagnose the viewer-facing failure, test a small representative segment, make the least destructive correction, and approve only the final deliverable. That sequence produces better quality and a process the team can repeat.
References
- Recapo How to Fix Uneven Volume in a Video, accessed August 26, 2026.
- Internal workflow references linked above, prepared for the same Recapo editorial batch.