How to Isolate Vocals from a Video Without Losing Quality
Learn how to isolate vocals from video while minimizing quality loss, checking stem residue, and choosing between vocal and dialogue separation.

To isolate vocals from video, start with the cleanest authorized source, choose a vocals/instrumental split for songs or a dialogue/music/effects split for spoken video, and preview the hardest overlaps before exporting. “Without losing quality” should mean minimizing avoidable damage—not promising a lossless result. Source separation estimates parts of an already mixed soundtrack, so loud accompaniment, reverb, crowd noise, and compression can leave residue or soften vocal detail.
Key Takeaways
- Match the separation model to the content: vocals/instrumental for music, dialogue/music/effects for most video edits.
- Use the earliest clean source and avoid unnecessary re-encoding before separation.
- Review consonants, breaths, sustained notes, reverb tails, and silent gaps for artifacts.
- Judge the vocal stem both alone and in the intended final mix.
- Keep the original soundtrack and make local repairs instead of overprocessing the entire stem.
First Decide What “Vocals” Means in Your Video
The word can describe two different editorial targets.
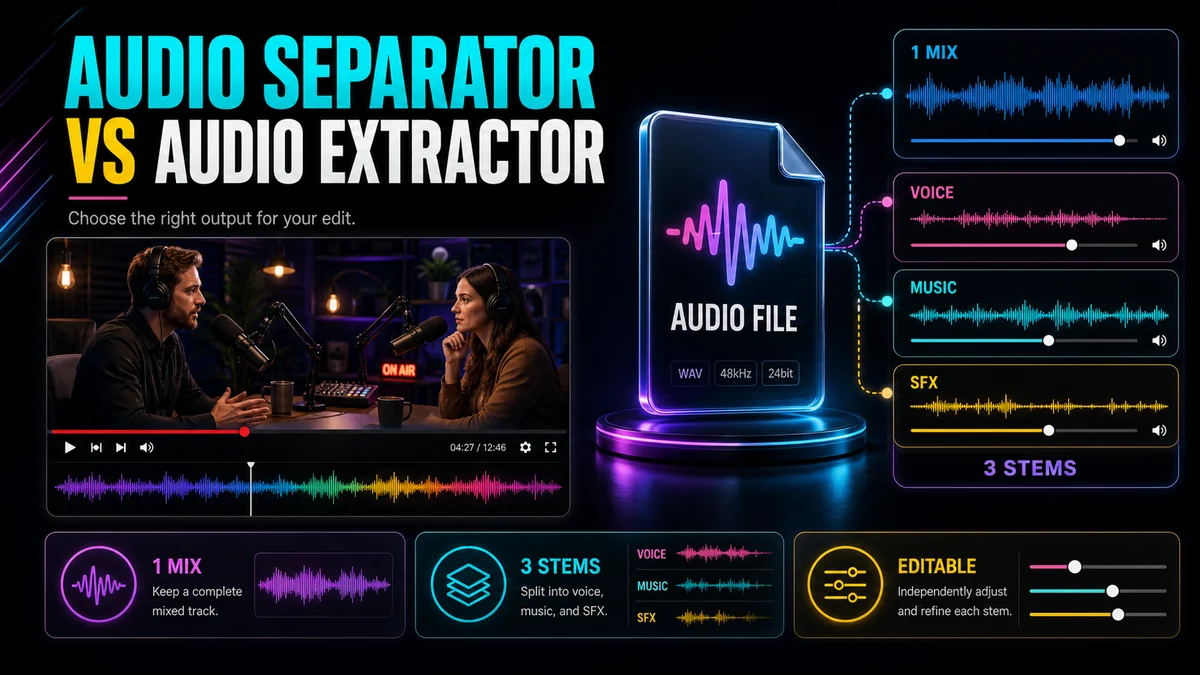
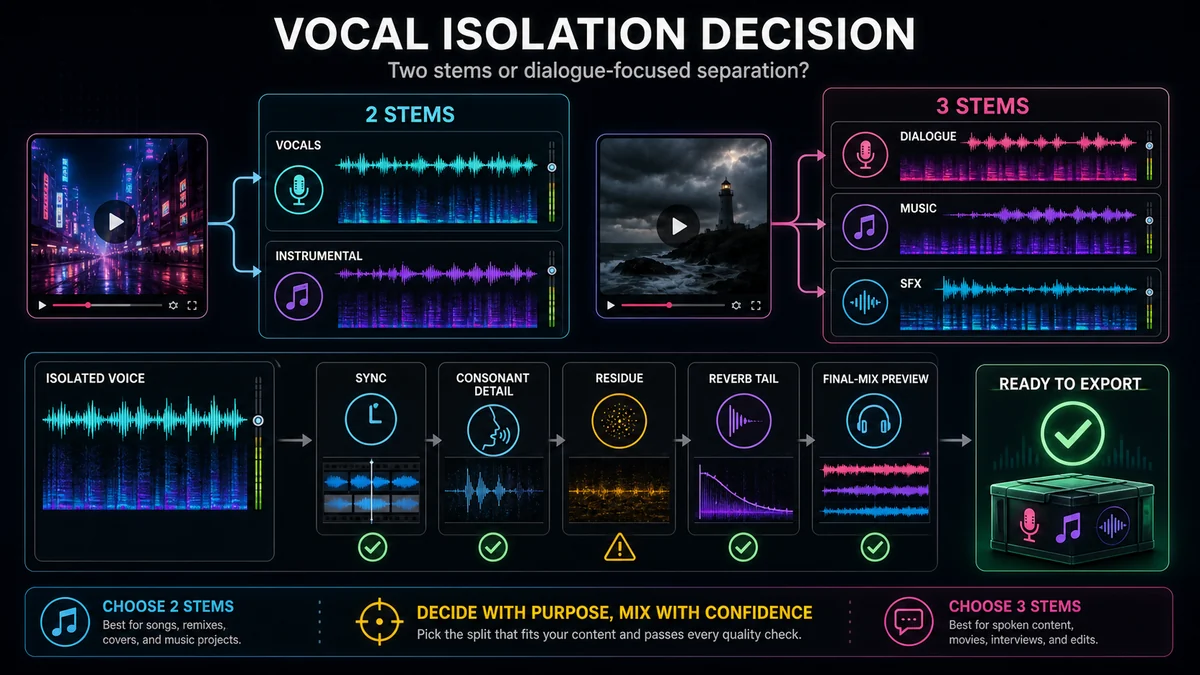
In a performance video, “vocals” usually means singing separated from the instrumental. In an interview, tutorial, film clip, or product demo, the target is spoken dialogue separated from music and sound effects. Choosing the wrong output can bury useful ambience with the instrumental or classify sung and spoken material inconsistently.
| Source and goalBest starting splitExpected outputsWhy | |||
| Song performance or karaoke | Vocals / instrumental | Two stems | Directly matches the musical task |
| Interview over background music | Dialogue / music / effects | Three stems | Preserves ambience and non-musical effects |
| Dubbing a scene | Dialogue / music / effects | Three stems | Keeps the sound bed while replacing speech |
| Acapella for a remix | Vocals / instrumental | Two stems | Produces the vocal asset and backing track |
| Voice for captions or transcript review | Dialogue / music / effects | Three stems | Focuses on intelligible speech |
Recapo provides both pathways. Its Vocal Remover uses a vocals/instrumental workflow, while the Audio Separator can return dialogue, music, and effects for video-centered work.
Why Perfect Isolation Is Not a Realistic Promise
When a video is mixed, the vocal and background become one waveform. Source separation does not reopen the original recording session. It estimates which sound belongs to which stem.
Several conditions make that estimate harder:
- the singer and an instrument occupy similar frequencies;
- speech is quieter than the score or effects;
- room reflections spread the voice across time;
- compression or limiting makes sources move together;
- a low-quality copy has smeared transients and high-frequency detail;
- crowd voices resemble the lead vocal.
The result can include bleed, metallic or watery textures, softened “s” and “t” sounds, missing breath detail, or holes in the accompaniment. Recapo’s official separator pages explicitly warn that separation can leave faint residue and is not a lossless un-mix. A trustworthy workflow plans for that limitation.
Step-by-Step Vocal Isolation Workflow
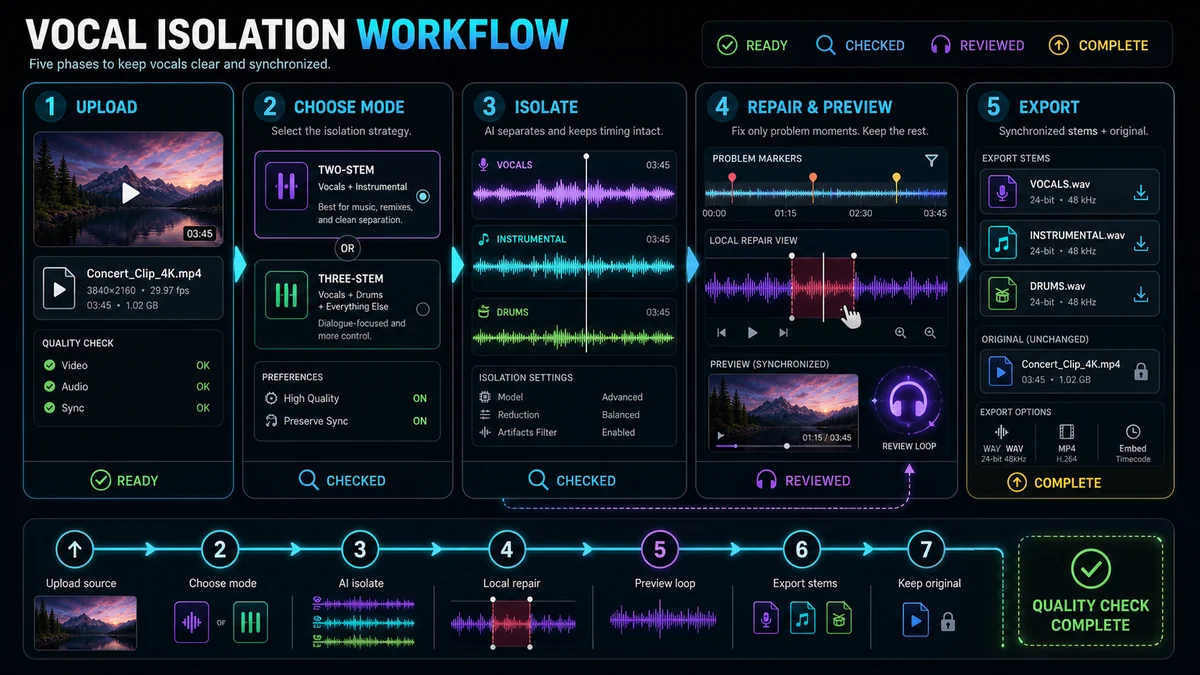
1. Start with the best source
Use the earliest generation you are allowed to edit. Avoid extracting from a social-media download if the original video is available. Repeated encoding can add artifacts before separation begins.
Do not apply global equalization, heavy compression, or aggressive noise reduction automatically. Those processes can reshape the vocal and background together. If the source is noisy, test a short section with cleanup before and after separation and keep the version with fewer audible side effects.
2. Mark the difficult moments
Listen through the source and note:
- loud accompaniment under a quiet voice;
- singing with long reverb or delay;
- applause, chants, or overlapping speakers;
- sharp effects that occur on syllables;
- passages where the voice drops to a whisper;
- moments with wind, hum, or hiss.
These are your quality-control points. An easy opening sentence cannot prove the whole stem is clean.
3. Choose the separation mode
Use vocals/instrumental when the vocal is part of a music mix and you want an acapella, karaoke bed, or remix material. Use dialogue/music/effects when you need spoken voice while preserving non-musical background details separately.
Upload the source to the appropriate Recapo tool and confirm the current on-page controls before processing. Product interfaces and options can change, so the live official page is the source of truth.
4. Preview the isolated voice
Listen on headphones at a comfortable level. Check intelligibility first, then naturalness. A louder stem is not automatically a better stem.
Pay attention to:
- the beginning and end of consonants;
- sustained vowels and sung notes;
- pauses where accompaniment residue becomes exposed;
- breaths and quiet words;
- reverb tails after each phrase;
- lip-sync for spoken video.
Then audition the instrumental, music, and effects outputs. If recognizable vocal fragments remain there, they may reappear when you reuse those stems.
5. Compare in context
Place the isolated vocal in its intended setting. For a remix, listen with the new backing track. For captions or transcription, check whether every word is clear. For a dub, combine music and effects without the original dialogue and listen for residue.
Some solo artifacts are masked in the final mix. Other problems—especially doubled words or a missing consonant—become more distracting. Make the decision in context, not from a solo waveform alone.
6. Repair only what needs repair
If most of the stem is usable, do not push stronger processing across the entire recording. Instead:
- automate down a short burst of bleed;
- fade a rough boundary;
- patch a syllable from another authorized take when editorially appropriate;
- retain a controlled amount of ambience so pauses do not sound unnaturally empty;
- use targeted spectral repair for an isolated event;
- apply cautious noise reduction only to steady unwanted textures.
Official Audacity guidance says general noise reduction is suited to constant sounds such as hiss, hum, or fan noise, not individual clicks, pops, or irregular background activity. Sudden sounds should be handled as local events whenever possible.
7. Export and preserve a reversible set
Keep the original mix, isolated voice, complementary stem or stems, and the edited result. Maintain the same start time so every file stays synchronized. Before deleting anything, reopen the exports and check that the full duration plays correctly.
Quality Checklist Before You Use the Stem
- The voice stays synchronized with the picture.
- Quiet words and consonant edges remain understandable.
- Music or effects residue is acceptable in pauses.
- The voice does not sound hollow, bubbly, metallic, or phasey.
- Reverb tails do not cut off abruptly.
- The complementary stem does not contain distracting vocal fragments.
- The isolated vocal works in the final mix, not only in solo.
- The original soundtrack is preserved.
Common Problems and Better Responses
The vocal sounds underwater
This often indicates that stronger isolation is also removing vocal detail. Step back from additional denoising or filtering. Compare another separation mode, restore a little contextual ambience, or accept a small amount of bleed if it sounds more natural than aggressive cleanup.
Music remains under the voice
Check whether the residue is limited to certain phrases. A replacement music bed may mask faint bleed. For exposed speech, reduce only the affected region or try dialogue separation if you began with a music-oriented vocal split.
The voice disappears during loud effects
The model may have classified part of the voice with the effect. Review the corresponding complementary stem and the original mix. A local patch can be less damaging than increasing processing across the entire recording.
Reverb makes the stem sound distant
Reverb consists of reflections blended with the direct voice. Adobe’s official documentation describes de-reverb as estimating a reverberation profile and applying an adjustable amount of processing. Use such processing conservatively: too much can thin the voice, and no tool can recover detail that was never captured separately.
Wind or hiss remains in the isolated voice
That is a noise problem after the source-separation problem. Use Audio Noise Reduction on the vocal or dialogue stem, preview the result, and stop before speech begins to sound synthetic. Steady noise is generally easier to suppress than one-off impacts.
Recording Choices That Improve Future Isolation
Post-production begins at capture. When you can control the next recording:
- place the microphone closer to the speaker or singer;
- reduce monitor or loudspeaker spill into the microphone;
- record separate microphones or tracks when the production allows it;
- use wind protection outdoors;
- choose a less reflective room or add soft furnishings around the recording area;
- monitor a short test before the full take;
- preserve the original multitrack files.
True isolated recordings offer more control than any attempt to reverse a finished mix. Separation is most valuable when those originals do not exist or are not available in the current workflow.
Frequently Asked Questions
Can I isolate vocals from a video without extracting the audio first?
Yes, when the separator accepts video input directly. Extraction is only necessary if you also want a standalone copy of the complete soundtrack or another tool requires audio-only input.
Is a vocal remover the same as a dialogue separator?
They are related but optimized for different outputs. A vocal remover usually returns vocals and instrumental; a video-oriented separator can keep dialogue, music, and effects independent.
Can the isolated vocal be completely lossless?
No guarantee is credible for a finished mix. The goal is to preserve useful vocal detail while keeping residue and artifacts low enough for the intended edit.
Should I use noise reduction on the isolated voice?
Use it only when unwanted noise remains. Preview a modest pass and compare with the original because aggressive denoising can damage speech and singing.
Why can I still hear the singer in the instrumental?
The vocal may share frequencies, reverb, or dynamics with the accompaniment. Those overlaps can leave faint vocal residue in the complementary stem.
Isolate the Right Voice Stem for the Job
Choose the output around the edit, not the label. Use Recapo’s Audio Separator for spoken-video control or its Vocal Remover for a two-stem music workflow. Preview the difficult sections, keep the original, and favor a natural usable result over an overprocessed attempt at total silence.
References and Official Sources
- Recapo Video Audio Separator
- Recapo AI Vocal Remover
- Recapo Audio Noise Reduction
- Audacity Manual: Noise Reduction
- Adobe Audition: Noise Reduction and Restoration Effects
Related Recapo Guides
- Audio Separator vs Audio Extractor: Which Tool Do You Need?
- How to Separate Dialogue, Music, and Sound Effects from a Video
- How to Remove Echo from a Video Recording